Setting up practitioner availability and schedule in Embodia
Overview
In this guide, we will go over how to set up your schedule. You can manage your schedule by:
- Adding the times you are available;
- Adding your "breaks".
Please note that your schedule will only act as a guideline when you or a clinic admin is scheduling a consult; this means that Embodia will only show a warning but not prevent you or a clinic admin from booking a consult when it falls outside of your available schedule.
Patients using online booking will only be able to book a consult if the time fits into your schedule.
Adding your availability
To set your schedule availability, click on My availabilities under Consults > My Schedule in the top bar:

To add to your schedule, click on Add to my schedule and fill out the form:

The form accepts the following information:
- Start date: The date from which the criteria that you provide in the form should be applied to your schedule.
- End date: The date after which the criteria that you provide in the form should no longer be applied to your schedule.
- Days: The days of the week when the availability should be applied to your schedule.
- From: The start hour and minute.
- To: The end hour and minute.
- How far in advance can the consult be booked?: The earliest a client can book an appointment. In the screenshot above, the client will not be able to book an appointment under this availability if the appointment is further than a month from now.
- What is the deadline to book the consult?: The latest a client can book an appointment. In the screenshot above, the client will not be able to book an appointment under this availability if the appointment is less than 6 hours from now.
- You can also restrict which services can be booked under this availability.
- You can also limit the number of consults that can be booked during that availability. This number only takes into account the consults with the bookable services. For example, if the availability is restricted to an "Assessment" service, and you set the limit to 2, Embodia will still allow patients to book an "Assessment" during this availability even if there are 3 other consults whose service is not "Assessment".
- You can also exclude certain days or date range from the schedule availability.
- Internal notes: Here you can add private/internal notes about this availability. This information will not be visible to patients
Note: You can use your availability to create breaks in your schedule. If for example, you would like a daily lunch break between 12-1 pm, set up two scheduled availabilities, for example, 8 am-12 pm and 1 pm-4 pm. This way, if on any day you would like to open your schedule during the scheduled lunch, you can easily add a 3rd availability for that day from 12 pm-1 pm.
Make me look busy
By default, when a patient is looking to schedule a consult using online booking, Embodia will show them all the time slots available for a given day.
If for a given day you don't have a lot of consults scheduled, the patient can be presented with a large number of time slots and a sense that your schedule is wide open.
You can configure your schedule to make yourself "look busy" by restricting the number of time slots that can be returned to the patient. As your schedule fills up, Embodia will automatically release new time slots.
To configure this feature click Consults > My schedule > My availabilities.

If you have not previously configured the Make me look busy feature, you will see that it is turned off. To turn it on or edit it, click the pencil icon.

To restrict the number of time slots shown to a user trying to book online with you, enter a value greater than or equal to 1 in the Maximum time slots box, otherwise, leave this box blank.

After you input a value of 1 or greater in the Maximum time slots box, a Time slots behaviour box will appear. Here you can select how the available time slots will appear to users trying to book an appointment with you:
- Earliest time slots first;
- Latest time slots first;
- Cluster the time around the consults already scheduled for the day.

In our example above we have chosen 3-time slots and clustering options.
For the following scheduled day, a patient trying to book online would then see the following options available:

Adding breaks to your schedule
You've set your availabilities, but you want to add short, 'non-permanent' breaks to your schedule. Below are some examples.
To add breaks, click on My breaks under Consults > My Schedule in the top bar:

Click on 'Add a break' and fill out the form.

The 'Description' field is just for internal use and will not shown to patients.
The 'Colour' field is also for visual and internal use and will be used in the calendar view to differentiate different types of breaks.
What you select for the 'End date' field can vary depending on your use case. Here are some examples:
- No end date (ex. recurring lunch break)
- Non-recurring event/break (ex. a one-off appointment)
- Recurring break with an end date (ex. a professional development course)

Note: Recurring breaks are meant for something that is not 'permanent', just recurring for a short period (for example, you might have a course scheduled every Monday from 9 am-11 am for the next 10 weeks and would like to make that time slot unavailable in your calendar). If you would like to add a permanent break, this is best accomplished by adding your availability as outlined above.
Once a break is added, you can also exclude certain days or date range from the break by clicking on the '+' icon next to 'Excluded days':

Creating break templates
Break templates are useful for one-off breaks that you schedule frequently (e.g., phone calls, personal appointments).
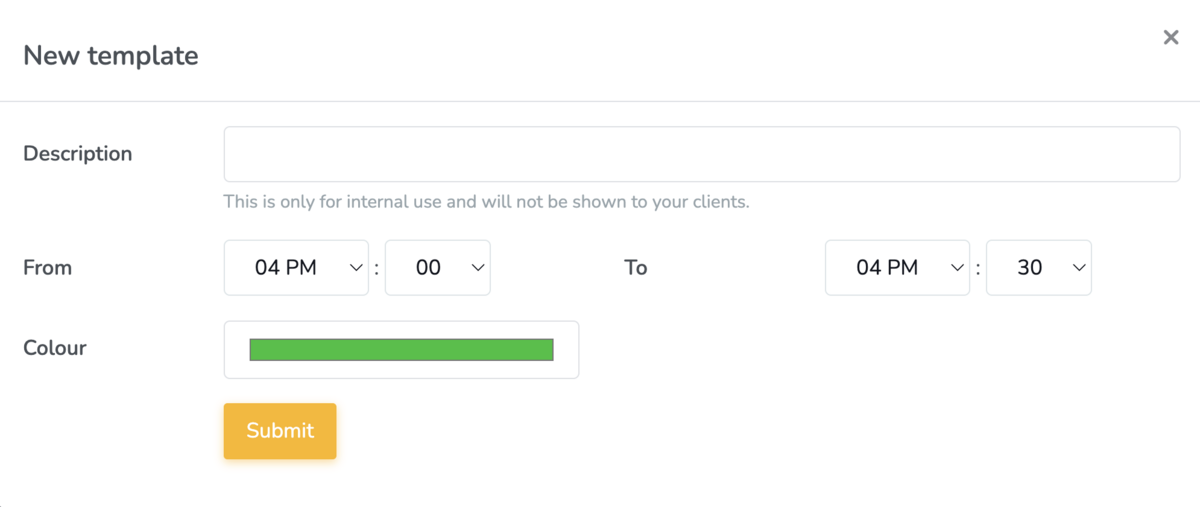
To create a break template:
- Go to Consults > My schedule > My breaks
- Navigate to My break templates
- Click Add a template

Enter the following details:
- Name/description of the break (for internal use only; this will not be visible to clients)
- Break time/duration
- Calendar colour
Once your template is created, you can use it directly from your calendar.
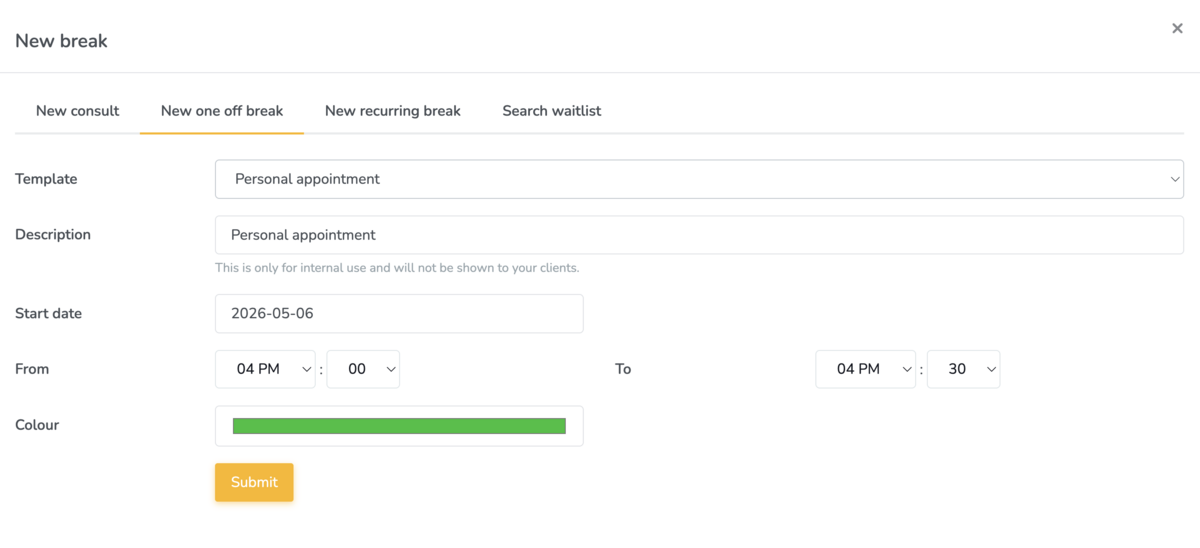
To apply a break template:
- From the calendar view, click on a time slot
- Select New one-off break
- Choose your desired template
You can adjust the details of the break as needed without affecting the original template.